Forget the Surface Pro 3 tablet password or ID? Don’t worry; we are here to help you in recovery by doing a factory reset Surface Pro 3.
If you forgot the Surface Pro 3 tablet password or you are facing a similar problem due to internal issues in your device, then it’s high time to factory reset your Surface Pro 3 tablet.
Today in our article, we are going to discuss all the possible ways to reset your Surface Pro 3 tablet. So, please read our article carefully; you will get all the details on that matter.
First of all, when we say “Factory reset Surface Pro 3”, this means it wipes all your data and backs your tablet to its normal position. The factory reset is the fastest and easiest way for your device to return it to its standard or original factory settings. So, without further ado, let’s take a look at the solution.
How To Factory Reset Surface Pro 3 Tablet?
Through this guide, we will suggest two different ways to factory reset the Surface Pro 3 tablet.
- Reset Surface Pro 3 with a USB recovery device
- Reset Surface Pro 3 from the logon screen.
So, let’s take a look at both methods. But before proceeding, remember factory reset will wipe all your essential data. So, make sure that you have backed up all your data; otherwise, you will lose your necessary data.
Factory Reset Surface Pro 3 With USB Recovery Mode
If you ever created a USB recovery drive from your Microsoft Surface Pro 3, then it’s time to use it and recover your tablet now. But if you don’t create it, download the surface recovery image from Microsoft’s official site create a drive with USB, and use it. To factory reset your tablet with USB recovery mode follow the essential steps below:

- Power off your device and insert the recovery drive into the Surface USB port.
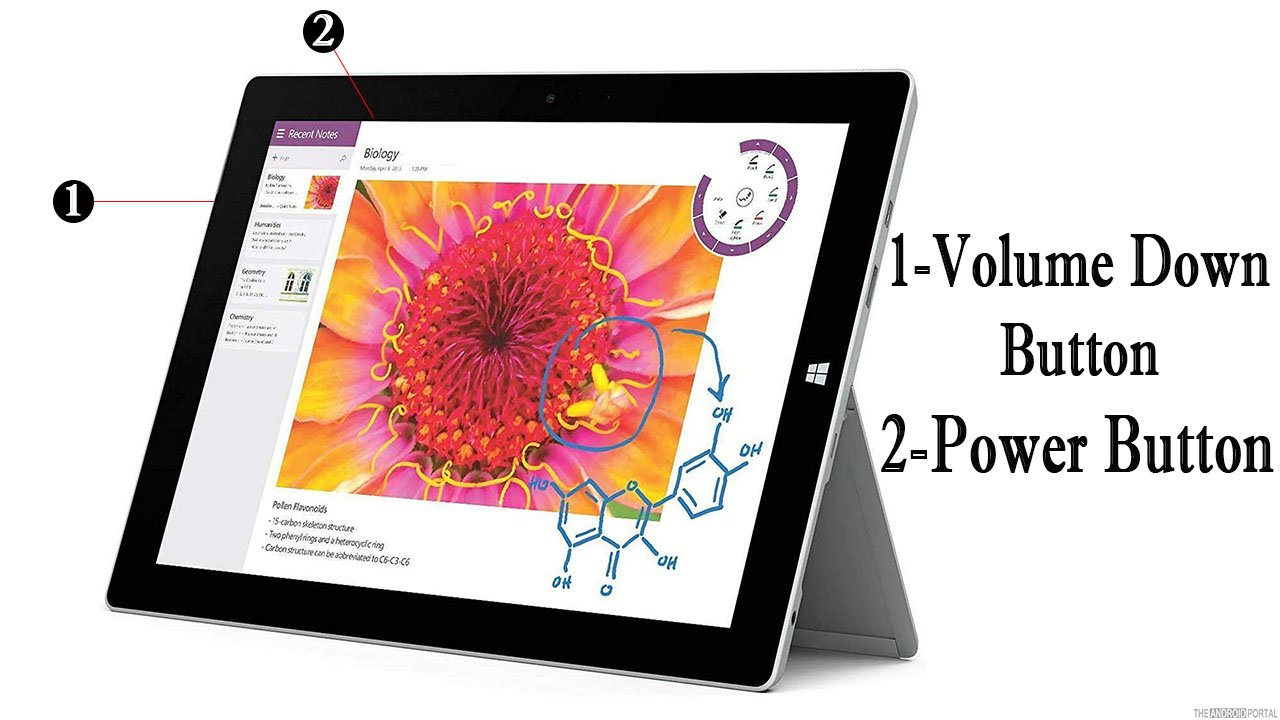
- Press and hold the “Volume Down Button,” press and release the “Power Button” when the Surface logo appears on the screen, then release the “Volume Down Button” too.
- Now you are in recovery mode, here select the language and keyboard layout according to your preference.
- Then click on “Choose an Option.”
- From the list, tap on “Troubleshooting” and then reset your PC.
- After that, a pop-up window will appear, and it will ask for the “Recovery Key.”
- Enter the Recovery Key, if remember, or tap on “Skip This Drive Option.”
- Then, select the windows that you want to recover and tap on “Yes” for further process.
- Repartition the device and then follow the instructions carefully.
- Wait until your resetting process has been completed.
We think these steps are a little tricky, so follow all the steps in the sequence, and you will surely reach your goal. If you are facing any problems with this method, try the other way.
Reset Surface Pro 3 from Logon Screen
This is the easy way to reset your device, but you have to focus on the steps; otherwise, you cannot factory reset your device easily and may face some trouble.
- Hold the “Power Key” to switch on your device.
- Select the “Settings Menu” from the edge of the screen.
- Then, click on “Change PC Settings” and select the “Update and Recovery” option.
- Under the update and recovery menu, click on the “Recovery Option.”
- After that, navigate to the “Remove Everything and Reinstall Windows” option.
- After all the steps pop-up window will appear to confirm and then next to begin the process.
- Next, you can choose either to remove my files or thoroughly clean the drive option.
- Finally, tap on “Reset” to confirm all the actions.
- Wait until the process is done.
Once the process has been completed, you can store your data and files again.
So, those are the steps to factory reset your Surface Pro 3 from the logon screen. Follow the steps for 100% results.
Summary
So, those are the two ways to factory reset the Surface Pro 3 tablet. The factory reset is vital for solving minor and major problems in your device. To maintain the performance of your device factory reset is required every 4-5 months.
Thanks for reading this post. We hope you enjoyed reading this article. If you have any queries then comment below, and we will respond to you as soon as possible. For more updates, do follow us and stay tuned with us at The Android Portal.
