Want to transfer Facebook photos and videos to Google Photos? Here you have arrived on the right webpage. Read this post till the end to know everything.
Facebook, as we all know, is a widely used social media platform to chat, share photos and videos with friends and relatives. Every other person shares a video or photo for entertainment. Many people store or save them on Facebook to watch that later whenever they want. But this leads to more use of phone storage due to which you have to delete other data and apps to free up some space.
The best idea here is to transfer Facebook photos and videos to Google Photos so that you always have a backup, download it whenever you need it, and free up some space. Google Photos is widely used for this purpose, providing us with a large amount of storage to save our data free of cost. You need to download the app and back up your stuff as they will also be well-secured and safe.
An Ultimate Guide To Transfer Facebook Photos and Videos to Google Photos
Method 1: Transfer Facebook Photos And Videos To Google Photos Via Iphoto Migration Tool

Step 1: Open the “Facebook” app from the apps drawer and click on “Three Horizontal lines” to open up the menu.
Step 2: Scroll down the lists until you see the “Settings and Privacy” option.
Step 3: Then, from the list, tap on “Settings” and navigate to the “Transfer A Copy Of Your Photos or Videos” tool under “Your Facebook Information.”

Step 4: Once you find this option, tap on it.
Step 5: On the next screen, you need to enter your Facebook password.
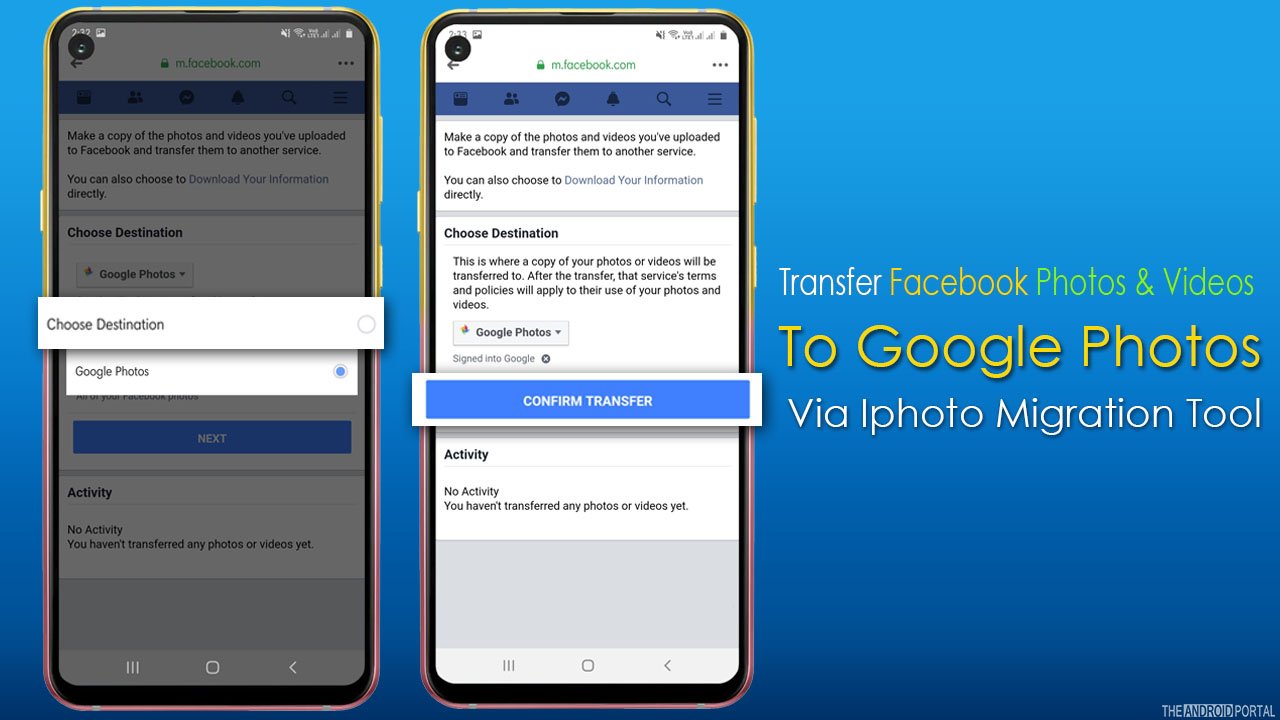
Step 6: Once done, tap on continue and “Choose the Destination” where you transfer your photos and videos.
Step 7: Tap on “Next” grant all the permissions and click on “Confirm Transfer.”
Step 8: Wait until all your photos and videos transfer to “Google Photos.”
Now you are all set. Once the transfer is finished, it will notify you. This process doesn’t delete photos or videos from Facebook.
Google Photos is the only tool that allows Facebook to transfer your data so, in the choose destination option, you can select Google Photos as a destination. It only makes a copy of them in the app so that you can delete yourself from Facebook to free up some space and access them anytime through the application.
Method 2: Transfer Facebook Photos And Videos To Google Photos Via Download Process

In this method, you first need to download photos and videos in the gallery app and then transfer them to Google Photos. This method is also straightforward and requires a few extra steps to follow. Let’s dive towards the step below:
Step 1: Open the “Facebook” app and tap on the “Three Horizontal lines” to open up the “Settings Menu.”
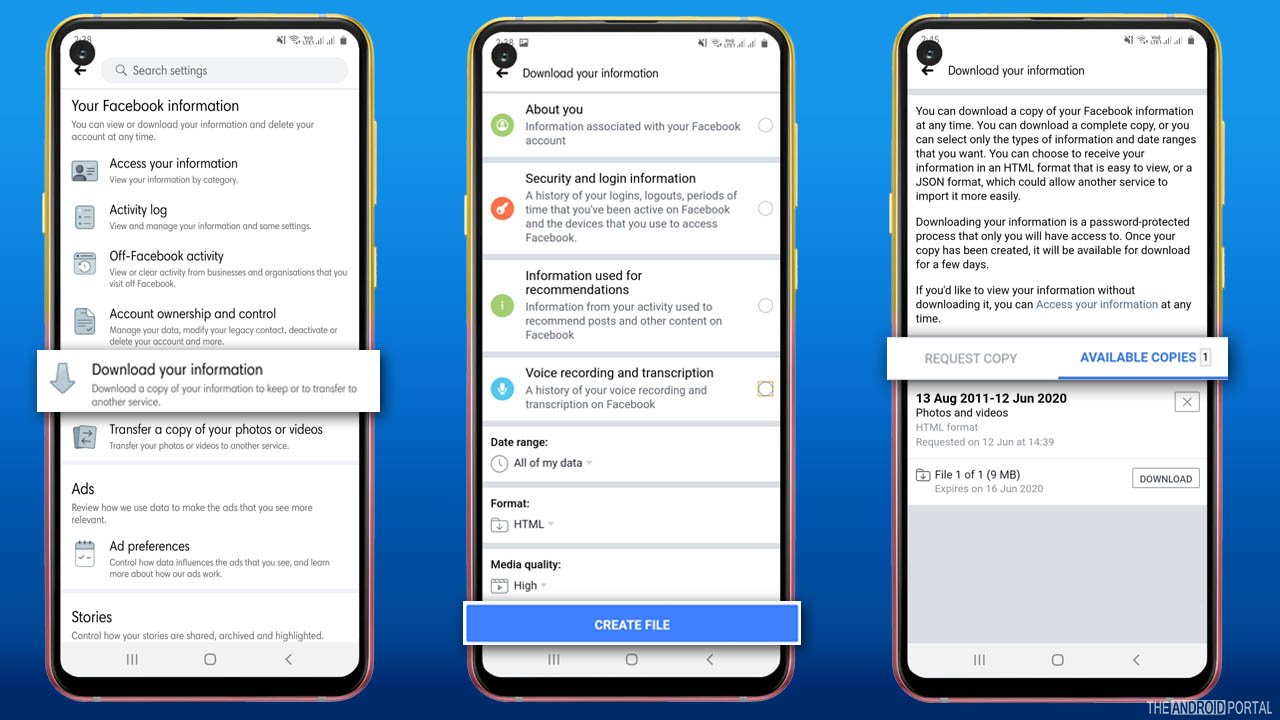
Step 2: From the settings menu, navigate to “Download Your Information” under “Your Facebook Information Tab.”
Step 3: On the next screen, “Uncheck” all the boxes except Photos And Videos.
Step 4: Once done, tap on “Create File” at the end of the screen.
Step 5: Wait until it creates files, and the transfer is completed.
Step 6: Once you receive the notification that the transfer is complete, click on it.
Step 7: After that, from the “Available Copies” section, tap on the “Download” option.
Step 8: Once the process is done, all photos and videos will be saved on your device.
Step 9: Select all the photos and videos and upload all the files in “Google Photos.”
Wrap Up
So, those are the quick steps to transfer Facebook photos and videos to Google Photos. We hope this post has helped you save your old memories by moving your photos and videos and freeing up some space.
Thanks for your valuable time. We hope you enjoy reading our post, and that this article clears your vision. For more updates, do follow us and stay tuned on your favourite website, The Android Portal.


